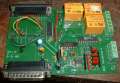
I have a plastic enclosure I want to mount a dsub connector on. its one of those Radio Shack 2x2.5x5 plastic boxes. It is funny how they don't have much and its usually overpriced, but they have cheap enclosures...
Anyway, I haven't worked with these things for a very long time and I remember my work being horrible hack jobs or taking absolutely forever.
What tools and methods does everyone use to get nice clean holes?
Cutting clean holes in enclosures
-
GoingFastTurningLeft

- Posts: 163
- Joined: Wed Sep 06, 2006 7:33 pm
- Contact:

Hi,
What i do is either draw on the surface with something or scribe the
pattern, even if i have to make the pattern myself. Another thing
that would work however is to paste a sticky label on the surface
with the pattern drawn on that first.
Then, i drill a hole starting with a small size bit and working up
to a larger size, that is big enough to fit a small cutter for the
Dremel drill. I then remove material with the cutter using a low
speed. If you take your time and try not to cut outside the line
you can get pretty good results this way. Minor imperfections
less than about 1/64 inch dont show up too well unless you
know they are there to begin with.
For LEDs i drill a hole big enough to fit the head of the LED though
but not the base. After sticking the LED through, use some sort of
glue to hold it from the back, and even hot glue works pretty well.
From the front, it looks really neat and professional. I've done
several new projects and several reworks this way. People always
like the look of it, as it's so neat and clean looking, and the LEDs
look especially nice when there is a dark background case color,
like black or dark blue. I've used red, green, and yellow against
a dark blue background and they all look really nice. I could
take a pic of one thing actually if you'd like to see one application
like this.
LEDs vs Bulbs, LEDs are winning.

Re: Cutting clean holes in enclosures
1) An electric drill complete with a large assortment of bits. A good large drill press would be nice. Use a countersink or larger bit to get rid of burrs.GoingFastTurningLeft wrote:What tools and methods does everyone use to get nice clean holes?
2) Fine toothed hacksaw blade. A good eye, patience, and experienced workmanship can yield amazing results with just a drill and a hacksaw blade with tape wrapped around it as a handle.
3) Assorted regular files in flat, round, "D", square. Also a set of fine files usually obtained from an electronics tools place.
4) A pin chuck (pin vise with 4 collet chucks) and a set of small numbered bits for circuit board and plastic work.
5) A variable speed Dremel with all the various grinders and cut-off wheels.
I've also used a hand powered chassis nibbler, and a jig saw with a metal blade rarely comes in handy. I wish that hand powered drills were still common. They would come in handy too.
Re: Cutting clean holes in enclosures
Send your CAD design file Here: Front Panel ExpressGoingFastTurningLeft wrote:What tools and methods does everyone use to get nice clean holes?
Finished Examples:


-
Engineer1138
- Posts: 458
- Joined: Thu Feb 05, 2004 1:01 am
- Location: Minneapolis, MN
- Contact:
How much do you want to pay? I have a DB25 punch that works great, but cost about $150. I've also tried square punches, but didn't have much luck with them. Still $$$
These days I'm lucky enough to have a small benchtop milling machine that I was able to justify the cost for since it sped up a job I had to get out the door. But for years I got by with a drill press, Dremel tool, files and a nibbler. You can do anything by hand, it just takes longer.
These days I'm lucky enough to have a small benchtop milling machine that I was able to justify the cost for since it sped up a job I had to get out the door. But for years I got by with a drill press, Dremel tool, files and a nibbler. You can do anything by hand, it just takes longer.
-
Robert Reed
- Posts: 2277
- Joined: Wed Nov 24, 2004 1:01 am
- Location: ASHTABULA,OHIO
- Contact:
Dtief
Just to give you a rough idea of' 'Front Panel Ex.' prices . I have had three panels made up by them in recent years for test equipment I designed. Although each one was somewhat different from the others, basically they averaged 6"x9"x 1/16" anodized panels. The average control count was ten. The average cost per panel - just over $100. What really kicks the cost up is the control lettering engraving - almost doubles the price. These are beautiful panels but quite pricey. For myself,they are reserved for SPECIAL projects. You can download their CAD program free from their website which is advertised in N&V. Make up your panel as desired and with one keystroke get instant pricing and delivery time.
Just to give you a rough idea of' 'Front Panel Ex.' prices . I have had three panels made up by them in recent years for test equipment I designed. Although each one was somewhat different from the others, basically they averaged 6"x9"x 1/16" anodized panels. The average control count was ten. The average cost per panel - just over $100. What really kicks the cost up is the control lettering engraving - almost doubles the price. These are beautiful panels but quite pricey. For myself,they are reserved for SPECIAL projects. You can download their CAD program free from their website which is advertised in N&V. Make up your panel as desired and with one keystroke get instant pricing and delivery time.
Hi,
Interesting panels there, nice...
While we are on this subject, anyone ever try making their
own front panels using the same transfer techique (ie blue paper)
used to make circuit boards?
The way i see it, draw the pattern on computer, print to blue
transfer paper, iron on to front panel, etch. In fact, electro
etching can be used here (no etching chemical needed) by using
the panel metal as one electrode (of course not with plastic).
Anyone try this yet?
Also, i had intended to try decal paper at some point but havent
gotten to that yet.
LEDs vs Bulbs, LEDs are winning.
-
Engineer1138
- Posts: 458
- Joined: Thu Feb 05, 2004 1:01 am
- Location: Minneapolis, MN
- Contact:
-
Engineer1138
- Posts: 458
- Joined: Thu Feb 05, 2004 1:01 am
- Location: Minneapolis, MN
- Contact:
cutouts
I've used the decal technique to use as a guide when cutting out aluminum panels. They work well but if you are using a an electric jigsaw you have to be careful or the plate of the saw will rub the decal off!
Who is online
Users browsing this forum: No registered users and 59 guests